Showing posts with label Projects. Show all posts

Thursday, July 29, 2010

Chalkboard Party

Woohoo Beth is having a party and you KNOW I can't resist a good themed party-- or a chalkboard for that matter!

I thought I'd compile all my chalkboard related yumminess into one post, sound good to you? Alright.. Here goes!

Here's an oldie but goodie.. bad lighting and crappy photography.. Hey I was a newbie alright? Okay, newbie-ish.. but I've learned. ;) My PB inspired chalkboard..


Oh here's another PB knock off involving the chalkboard paint. Gotta love it.


My absolute FAVORITE chalkboard paint project? Chalkboard tags for the entryway! LOVE-THEM.


So there you have it! My best chalkboard related things. How many times did I say chalkboard in this post,  I feel like it was one too many. Sorry about that. :) Make sure you bounce back to Beth's and check out everyone elses projects!


Sunday, July 25, 2010

Colors of love

It's cleaned. It's primed. It's ready to go. PLEASE sell me on a color. These are the top three runners:


or..

or....


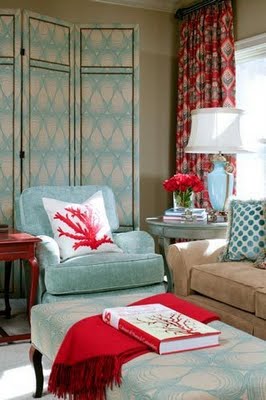
So.. There goes it. My heart is tugging at a yellow chair with green, white and yellow fabric. But aqua and red makes me smile. Black with green would be safe, and lovely.

Tuesday, July 20, 2010

Luck.

This can't be described as anything except luck.

Pure luck.


Who throws this out to the curb? Who does that? I'll feel really bad if they just put it out to clean it and it wasn't for free.

Kidding.

I'm sure it wasn't.

At least I hope it wasn't.

:)


Colors? Black? Colored cushion? Or bright color with a white cushion. Give me ideas! I'm in heaven! A project just fell into my lap! Happy Day!

Oh yeah, and don't hate on my dead grass there. That's the dogs...area.. grass doesn't grow in that corner. Don't talk about me behind my back because I have straw grass, with a little bit of weeds. :)

Monday, March 29, 2010

Front door frenzy

Okay, I'll admit it. I had no idea what to title this post so front door frenzy won. However, this post isn't even about the front door. It's the other door in the house, the back door. But I'll be honest and say I was a little scared titling my post Back Door Frenzy.. someone might be quite confused if they're googling said item and not looking for a wreath for their door. ;)

I'll admit another thing, this isn't a post about a wreath either. It's a monogram covered in jute and hung by some scrap fabric. If I was good at my blogger duties I would have taken pictures of everything being put together but I didn't. So enjoy some photos where I tried to stay out of the picture and ended up ruining all of them. Be prepared to cock your head to the side-- hey I never said I was a photographer. :)

This is when I gave up and just went for it. Enjoy my pajamas that I proudly wear at 6:00 in the afternoon. evening.

Don't forget to link up friday!!


diy day

The DIY Show Off


Show and Share day

Frugal Friday

Thursday, March 18, 2010

Painting

I took a leap, it's called Natural Choice by Sherwin Williams (mixed at the Orange store, however)

Light and airy, I'm kind of pumped. Can't wait to have you see the other treasures!


Monday, March 8, 2010

Hello, corkboard.

See this wall here?

Blah. Boring right? I think so too. With our new designated spot for outerwear (Michigan -10 below thick coats.) I had a big spot of wall to fill. I knew right away I wanted something like Sarah's chalkboard. But, I have quite a few chalkboards in my house. How many is too much? I don't know if we'll ever find out, but I wanted something different. I've been in love with this for a long time. Swooon. See, it's love. Now, to mix the two-- time to let them make a love child. A thick framed, cork board love child. It can't be that hard right? No, it isn't. Let me show you how.

Some thick and lover-ly trim from Home Depot/and or Lowes and some roll on cork, and a 2x4 piece of 1/4 plywood. Yep that's it. I screwed the trim and plywood into the wall instead of using my old stand by liquid nails. Just because I figured if Mr. P thought I was crazy and demanded I take it down, it wouldn't ruin the flimsy plaster walls as much as 8 holes would.

The cork? I hot glued it (lots of it!). Why do you ask? Because then it will be easy as pie to peel off (I think?)if I do have to take this off the wall for any reason at all. Good news is, Mr. P enjoys it as much as I do and said I can keep it up. So countersink those screws and use the wood filler to fill those holes!

Then I painted it with some black latex paint I had from my hallway closet project from you know where. I could have left it white but then I thought the entry way would be "Too white" if you know what I mean, plus the frame matches the keys, and the chalkboard tags. I plan to sand a bit to age it make it less.."shiny new", and it'll be done.

I love it, adore it, it makes me un-believably happy more happy when the finish is done (i.e the sides are painted. Shoot where is my painters tape!?), but I was too excited NOT to post. Actually it is believable that a huge skinny cork board could make you so happy right? Yes! I find myself peeking from the kitchen about a hundred times during the day and smiling at it. Wait till you see what is going on it. :) Bwahahaha. You'll have to wait till later for that!

DIY DAY,

Whatevergoes Wednesday!

Frugal Friday

Beneath my heart best diy projects in March! :)

Thursday, February 25, 2010

Entry way part....17.5 million

How far along are we now? Second trimester? :) Really it's taken about two three weeks but I think it's pretty much done. I'll let you see for yourself. Let's have a mini recap shall we?
I've linked all the stages separately be sure to check them out for the how-to's! :)
Start..drab..boring..orthopedic looking waitress shoes..


Stage 5 Welcoming art


Something cozy welcome us home, we're done!
Let's see that before and After again
I'd still like a fabulous door to walk into the kitchen with, but that takes time and money. Both of which I don't have right now. :) But I adore my new entry way. I did it myself (besides some saw help from B.D) Surprised husband with my talents, and gave the girls a place where they can forget to put their snow gear. I love it.
Don't forget to come on over for my first blog party-- Feature Yourself Friday!


Linking up to these lovely parties
Don't forget to vote for the next project on our list!

Thursday, February 18, 2010

Keys to my heart

In my attempt to finish the entry way sometime this year I've been cramming as much as I possibly can this week while Mr. P is home. Let's just say it's a little easier to craft, paint, and hot glue when there's someone watching the little devils angels while I work. :) Today I worked on this wall.

Tall, and empty are the two words to describe it. Boring would work too. I wanted something cute, nothing too personal since the house is still on the market {ugh!} But something that tugged at my heart strings. Everyone knows I'm a little sentimental about our first home. What's better than the keys to the house!
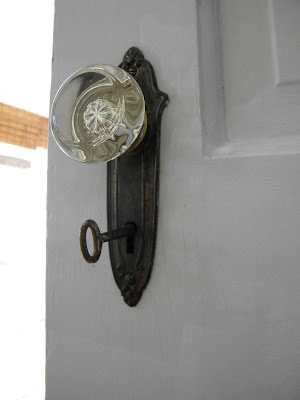
Each door in our house has it's own skeleton key, and since I've never had a reason to lock any of the doors in the house I've been using them for different things. Santa keys, apothocary fillers, and now art. As you can see I'm running out of keys! :)

Four left, but for this project we'll only be using three. I like things in threes and the fourth is a little shiny for my liking. At least for this project it is.

Nice and rusty and old. Gorgeous!

To start I purchased 3 12x12 frames at Michaels. They're usually 9.99 but this week (and almost everytime I see them) they're 50% off. I liked them because the matte is layered in the frame. Which makes it easy for the key to sit and not bulge out the back.

Other supplies, burlap or another medium for your key to sit on, a glue gun and 10 mintues.

Really, this was probably the fastest project ever! I cut the burlap to fit and glued it.

Making sure to pull it tight so you don't have a million wrinkles. You could double up on the fabric if you're using burlap so it's not so transparent. I for one didn't have enough to go around, and I just flipped the paper in the frame over so the white shows through (instead of the couple getting married, as lovely as they are). Good enough for this chick!

Then I put a smidgen of glue on the key and pressed her down. That's the nice part about hot glue if you ever want to change your mind it comes off so easy! Put everything back in the frame and you're done. Yep, that easy! See, how fast that can go!

The seriously hard part was getting a picture of them on the wall without a glare from the door. So I had to just give in. Forgive me! :) Now one of the the first things I see when I walk into the door, is the pretty (fast, and cheap) art work. I can't get enough of it!


The Girl Creative


DIY Day @ ASPTL


The DIY Show Off


Related Posts Widget for Blogs by LinkWithin